How to train custom object detection model using TensorFlow Object Detection API
In this post I will guide you in creating a custom object detection model using Tensorflow’s Object detection API.
To keep the post short I have divided the tutorial into 3 parts. In this part I will show you how to install and test TensorFlow and TFOD library with GPU support in your system.
After completing this tutorial, you will know:
- Install TFOD2 with GPU
- Prepare and annotate image data for custom object detection
- Configure a model from TFOD model zoo
- Train and test the model
In this post I am using Ubuntu machine to install the package and train object detection model. Below are the specifications of my machine and the libraries I am going to use.
- OS : Ubuntu 20.04 LTS
- Python : 3.9
- Tensorflow : 2.9.0
- TFOD : v2
Installing Tensorflow Object Detection API with GPU
If you haven’t installed tensorflow with GPU enabled yet please check out my post to install it. I have also provided a bash script which will take care of the installation for you.
Once tensorflow is installed on your system and you have tested it on yur GPU machine we will go ahead installing the object detection API of tensorflow.
First, clone the tensorflow object detection model repository in your local system from this repo.
After cloning the repository, install the protobuff library using the below commands. If you haven’t activated your conda environment yet, now is a good time to activate it.
conda activate tensorflow
sudo apt install protobuf-compiler
pip3 install cython
pip3 install pycocotools
After the protobuff library is installed cd into your TF_repo_PATH/model/research folder and run the below command.
protoc object_detection/protos/*.proto --python_out=.
The above command will not produce any output. The next dependency of TFOD is the COCO API installation. For this first clone the coco repository in a folder outside your models folder. After cloning the repo, build the coco API using the below commands and then copy the pycocotools folder generated after the build in the model/research/ folder.
git clone https://github.com/cocodataset/cocoapi.git.
cd cocoapi/PythonAPI
make
cp -r pycocotools PATH_TO_TF/TensorFlow/models/research/
Once the coco API installation is done, we will move on to setup and install the objection detection library in the conda environement. Run the below commands from the research folder to start the installation.
cp object_detection/packages/tf2/setup.py .
python -m pip install --use-feature=2020-resolver .
Testing the object detection API
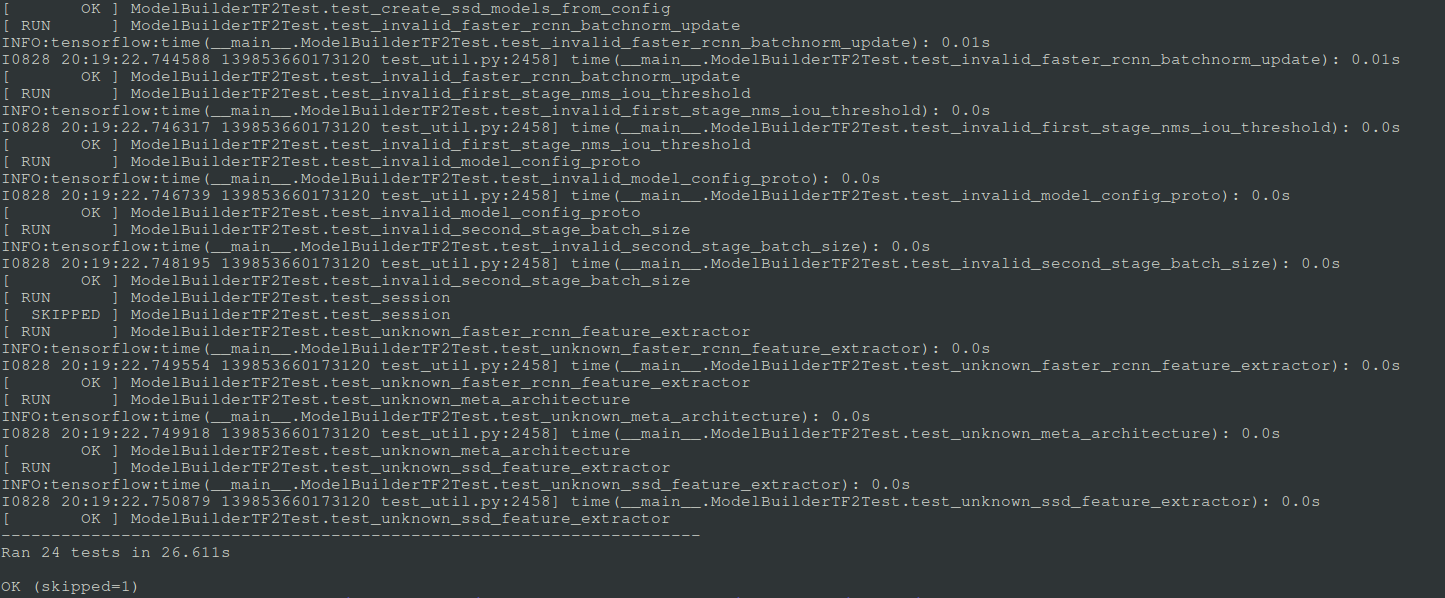
Now that we have installed the API in our system, let’s go ahead and test it. Run the below command that will trigger a chain of tests performed using one of the models from the Tensorflow Model Zoo and will show a similar output as below. The command needs to be run from the research folder.
python object_detection/builders/model_builder_tf2_test.py
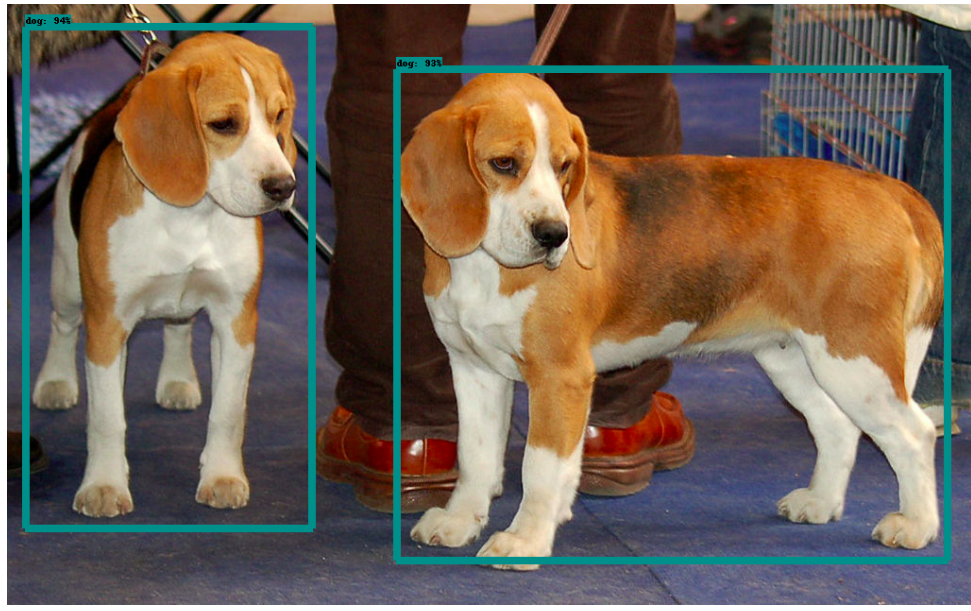
If you want to see the object detection in action, you can run the notebook present in research/object_detection/colab_notebooks/object_detection_tutorial.ipynb. One of the output of this notebook is shown below.